Sleeklens Presets Review
I was recently given the opportunity to test & review some handy Lightroom presets from the nice folks over at Sleeklens. If you use Lightroom much you are probably familiar with the usefulness of presets. Though it's nice to have handy one-click editing at your fingertips, I always consider presets to be a starting point and not a finishing point. This is where presets such as those offered by Sleeklens can come in handy.
How I Create & Edit Images
Before we delve into the before & afters, a quick primer on how I shoot & edit might be handy. I'm of the school of thought that getting the image right in the first place is the best starting point in making good images. Though the camera's sensor and human eye never see the same scene as it was. Digital images often need updated [edited] to do the scene justice as your eye saw it.
So when I do use presets they are 'primers' or 'starters' then I fine tune the image with Lightroom's individual controls as I go along. The nice thing about Sleeklens' offering is that it is built as a 'layered' system to editing in Lightroom that others don't accomplish. So there can be less 'right panel' editing and quicker 'left panel' edits to achieve a similar result.
Not Just Another Preset
As I mentioned above, Sleeklens presets use a sort of building block or layering method. While their presets also come with 'all-in-one' clicks that you might be used to the stackable options are a different approach. I won't explain how that works in detail as they have put together a short video on exactly how it works, but you can see some examples I used below.
The other handy thing I really enjoyed using are the brush presets, which handily also function in the gradient tool. While you can always customize your brush settings to your heart's content having quick presets in the brush & gradient menu can speed up your workflow.
Alright, enough chatter - let's get into some before & after images to see what these presets are all about.
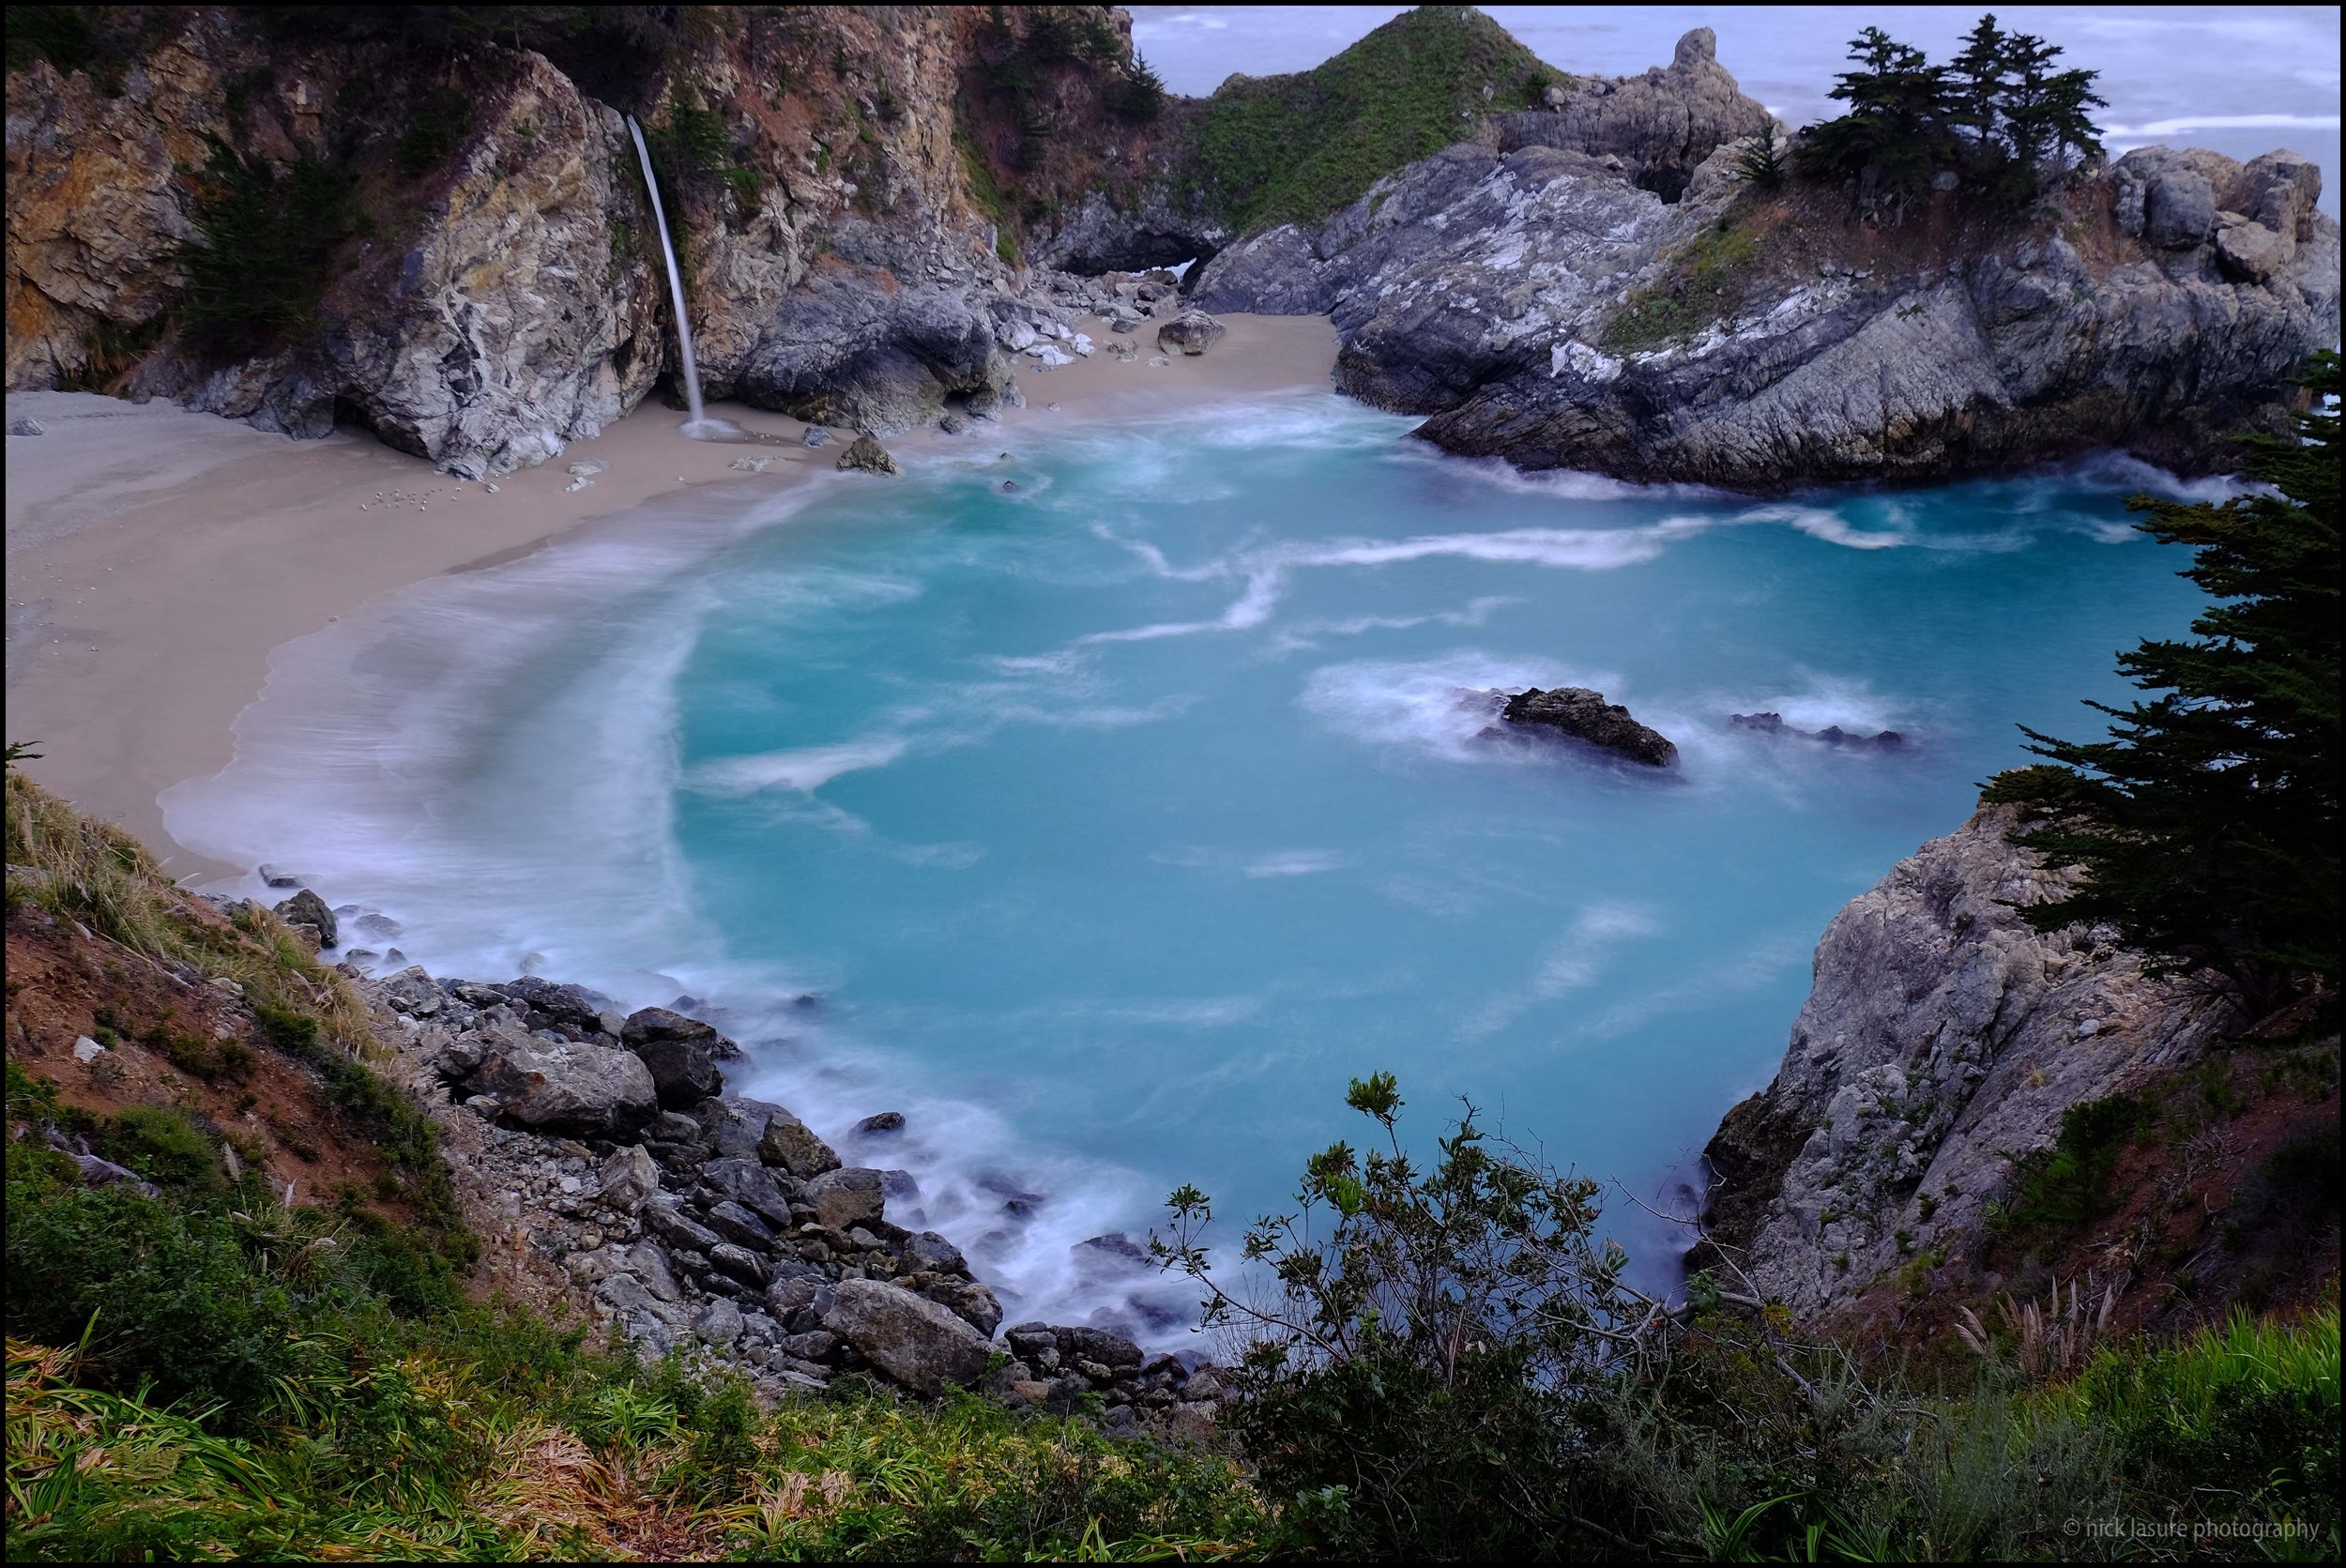
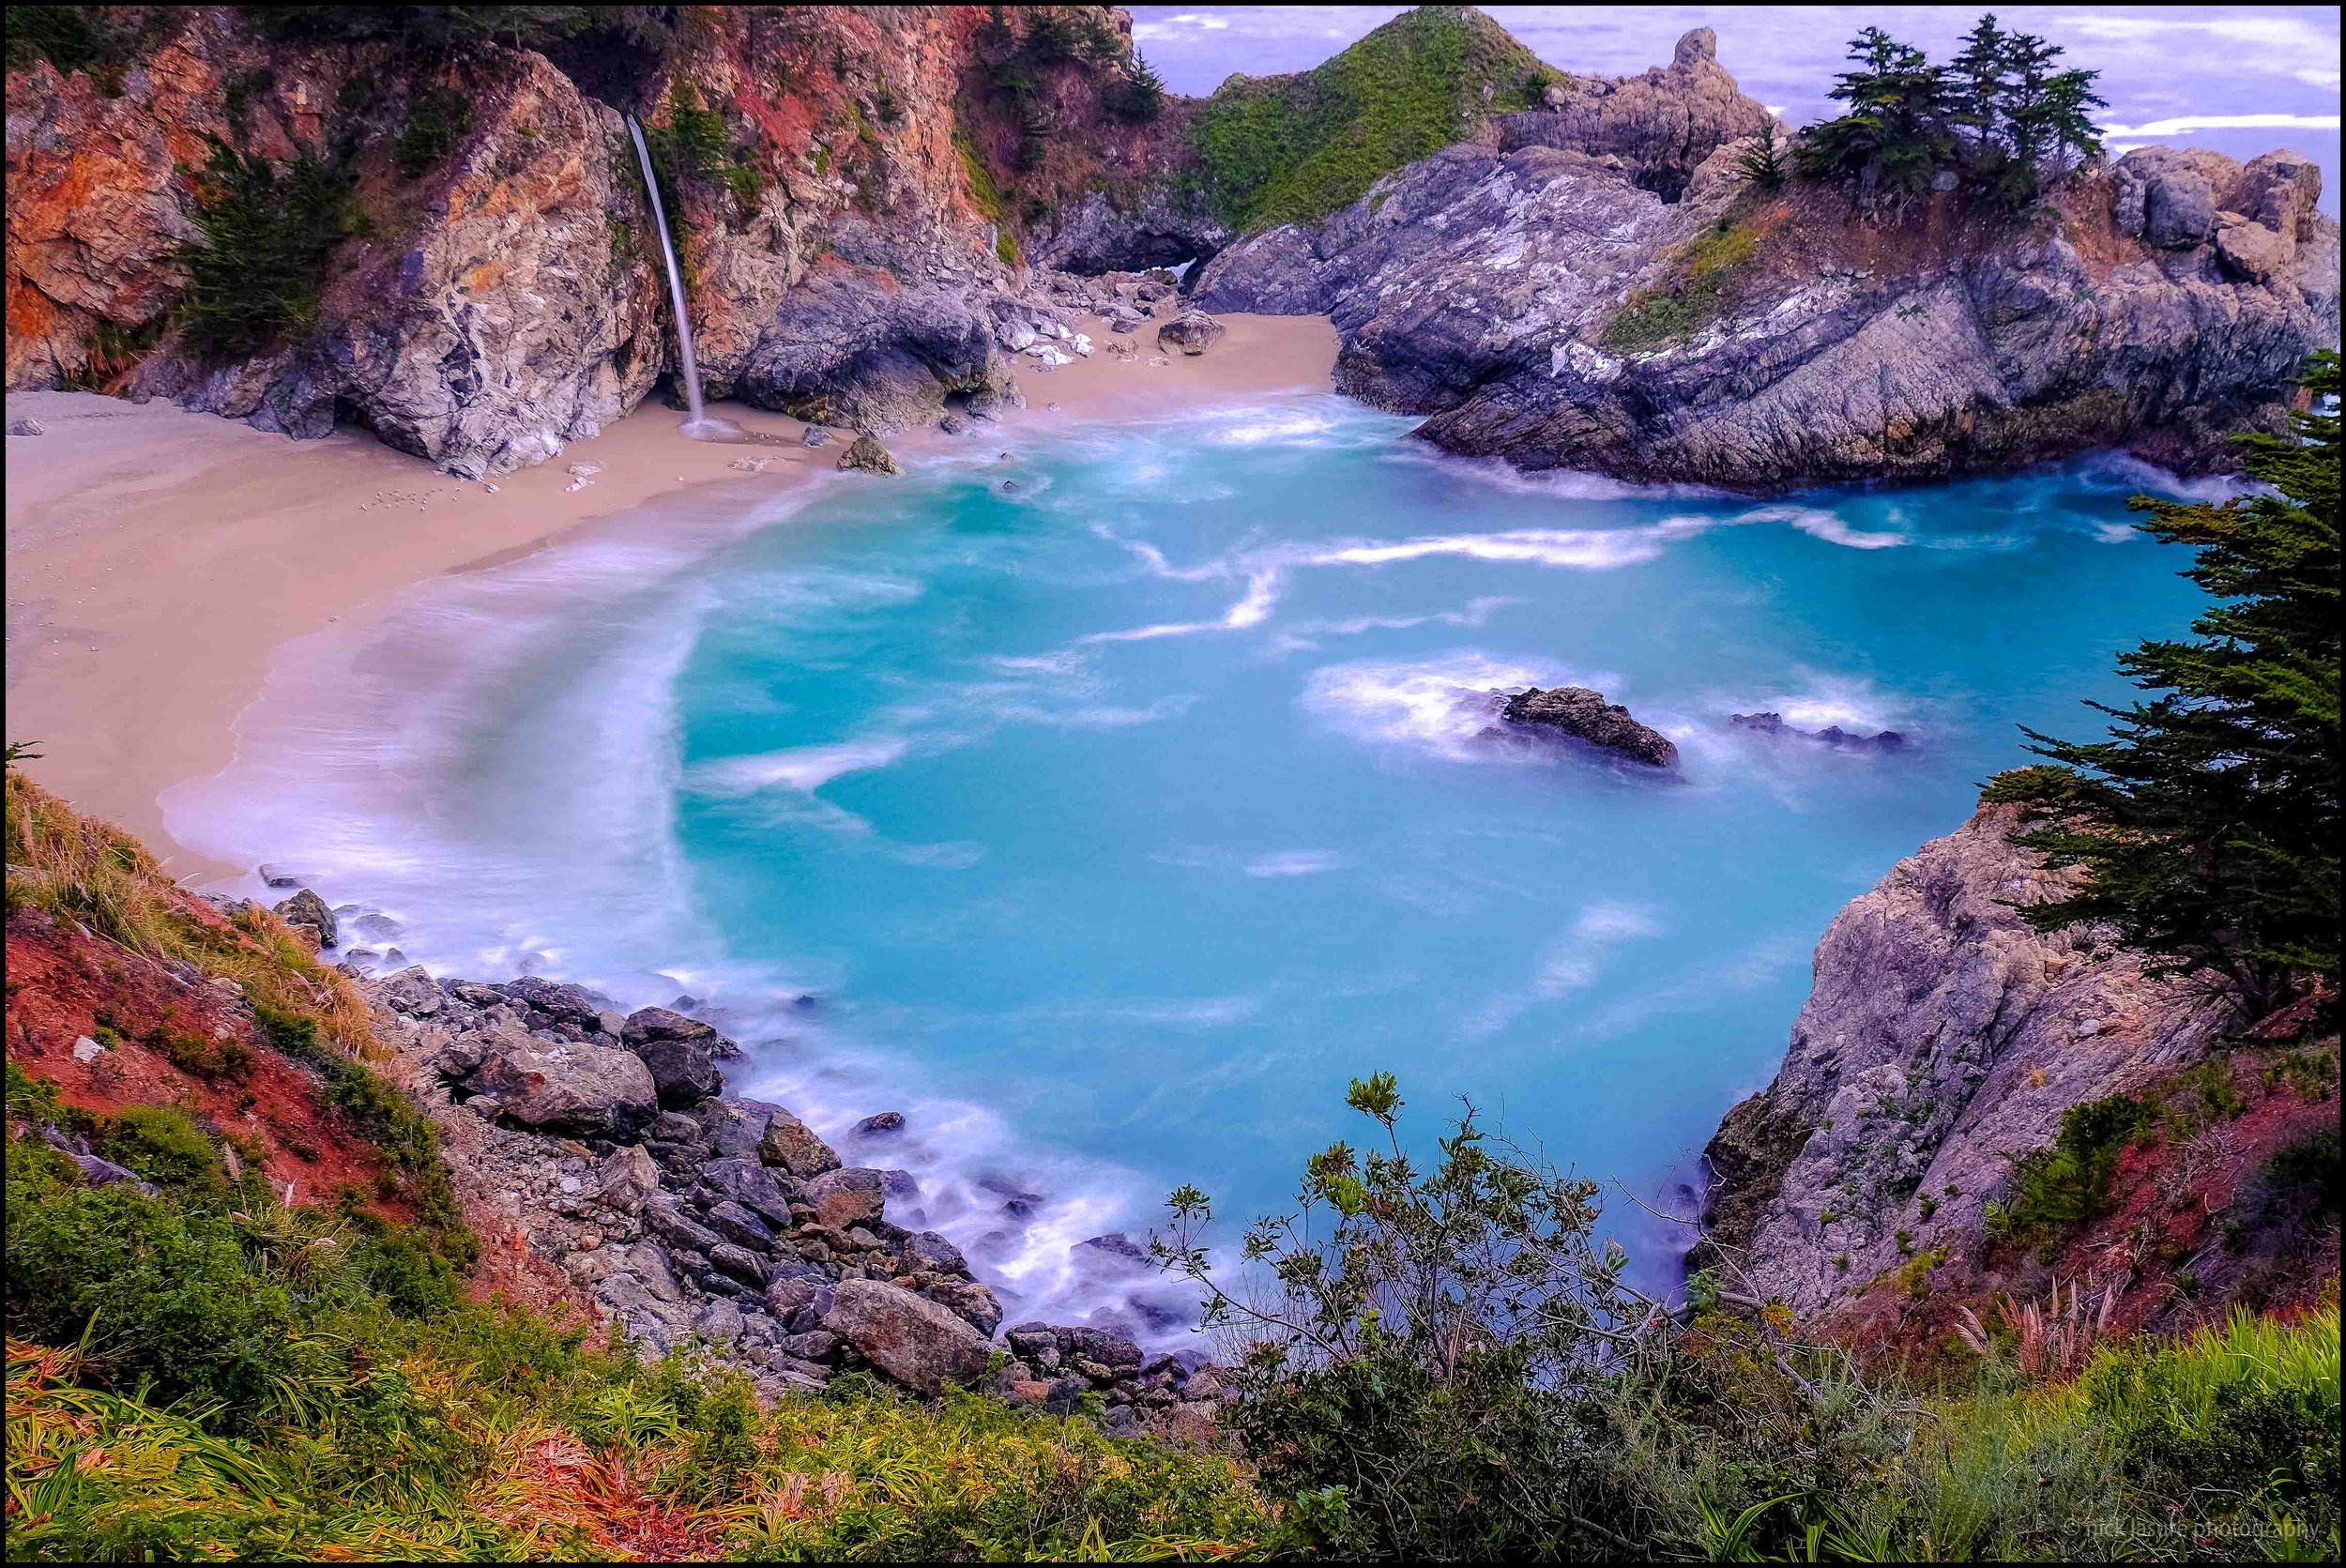
Before/After #1 - This was an image from McWay Falls in Big Sur, California. The image on the left was SOOC from my Fuji X-T1 as a JPEG with a 10 second exposure. For this edit I decided to show what the all-in-one preset can do with no further touches. This was the Calm Sunset preset from the Through the Woods landscape collection. I really like the warm tones and clarity the preset gave the image.
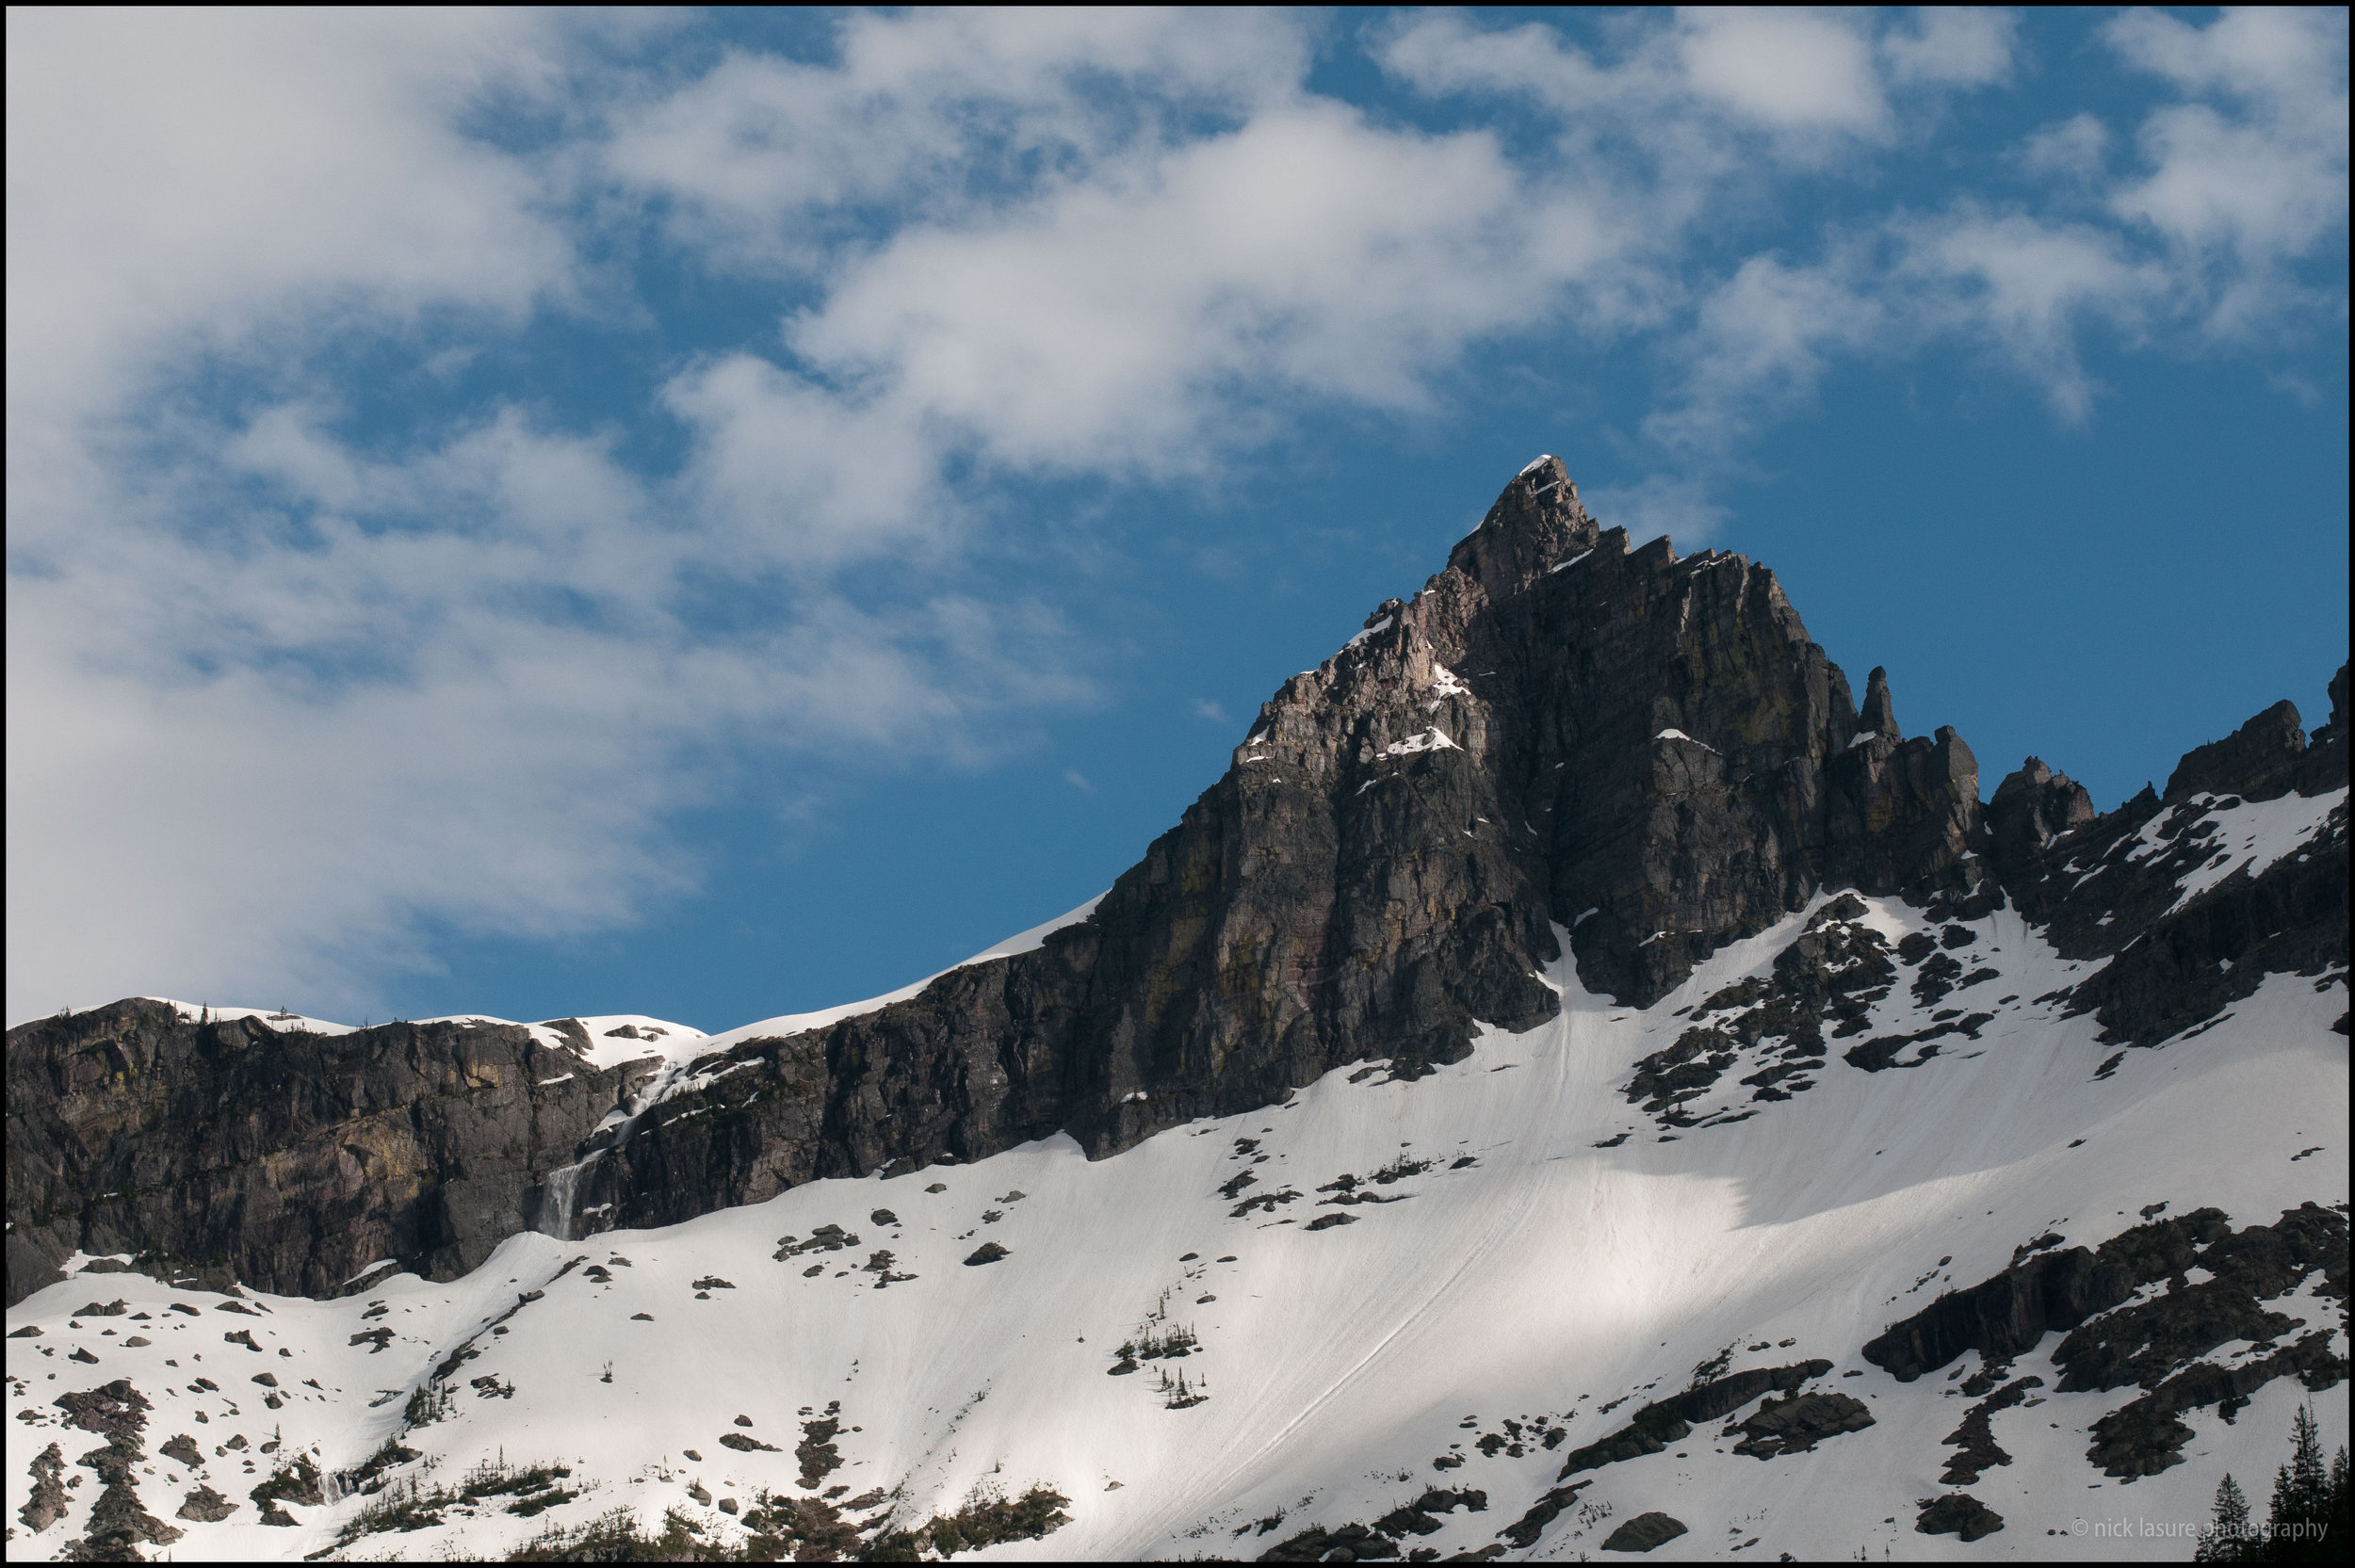
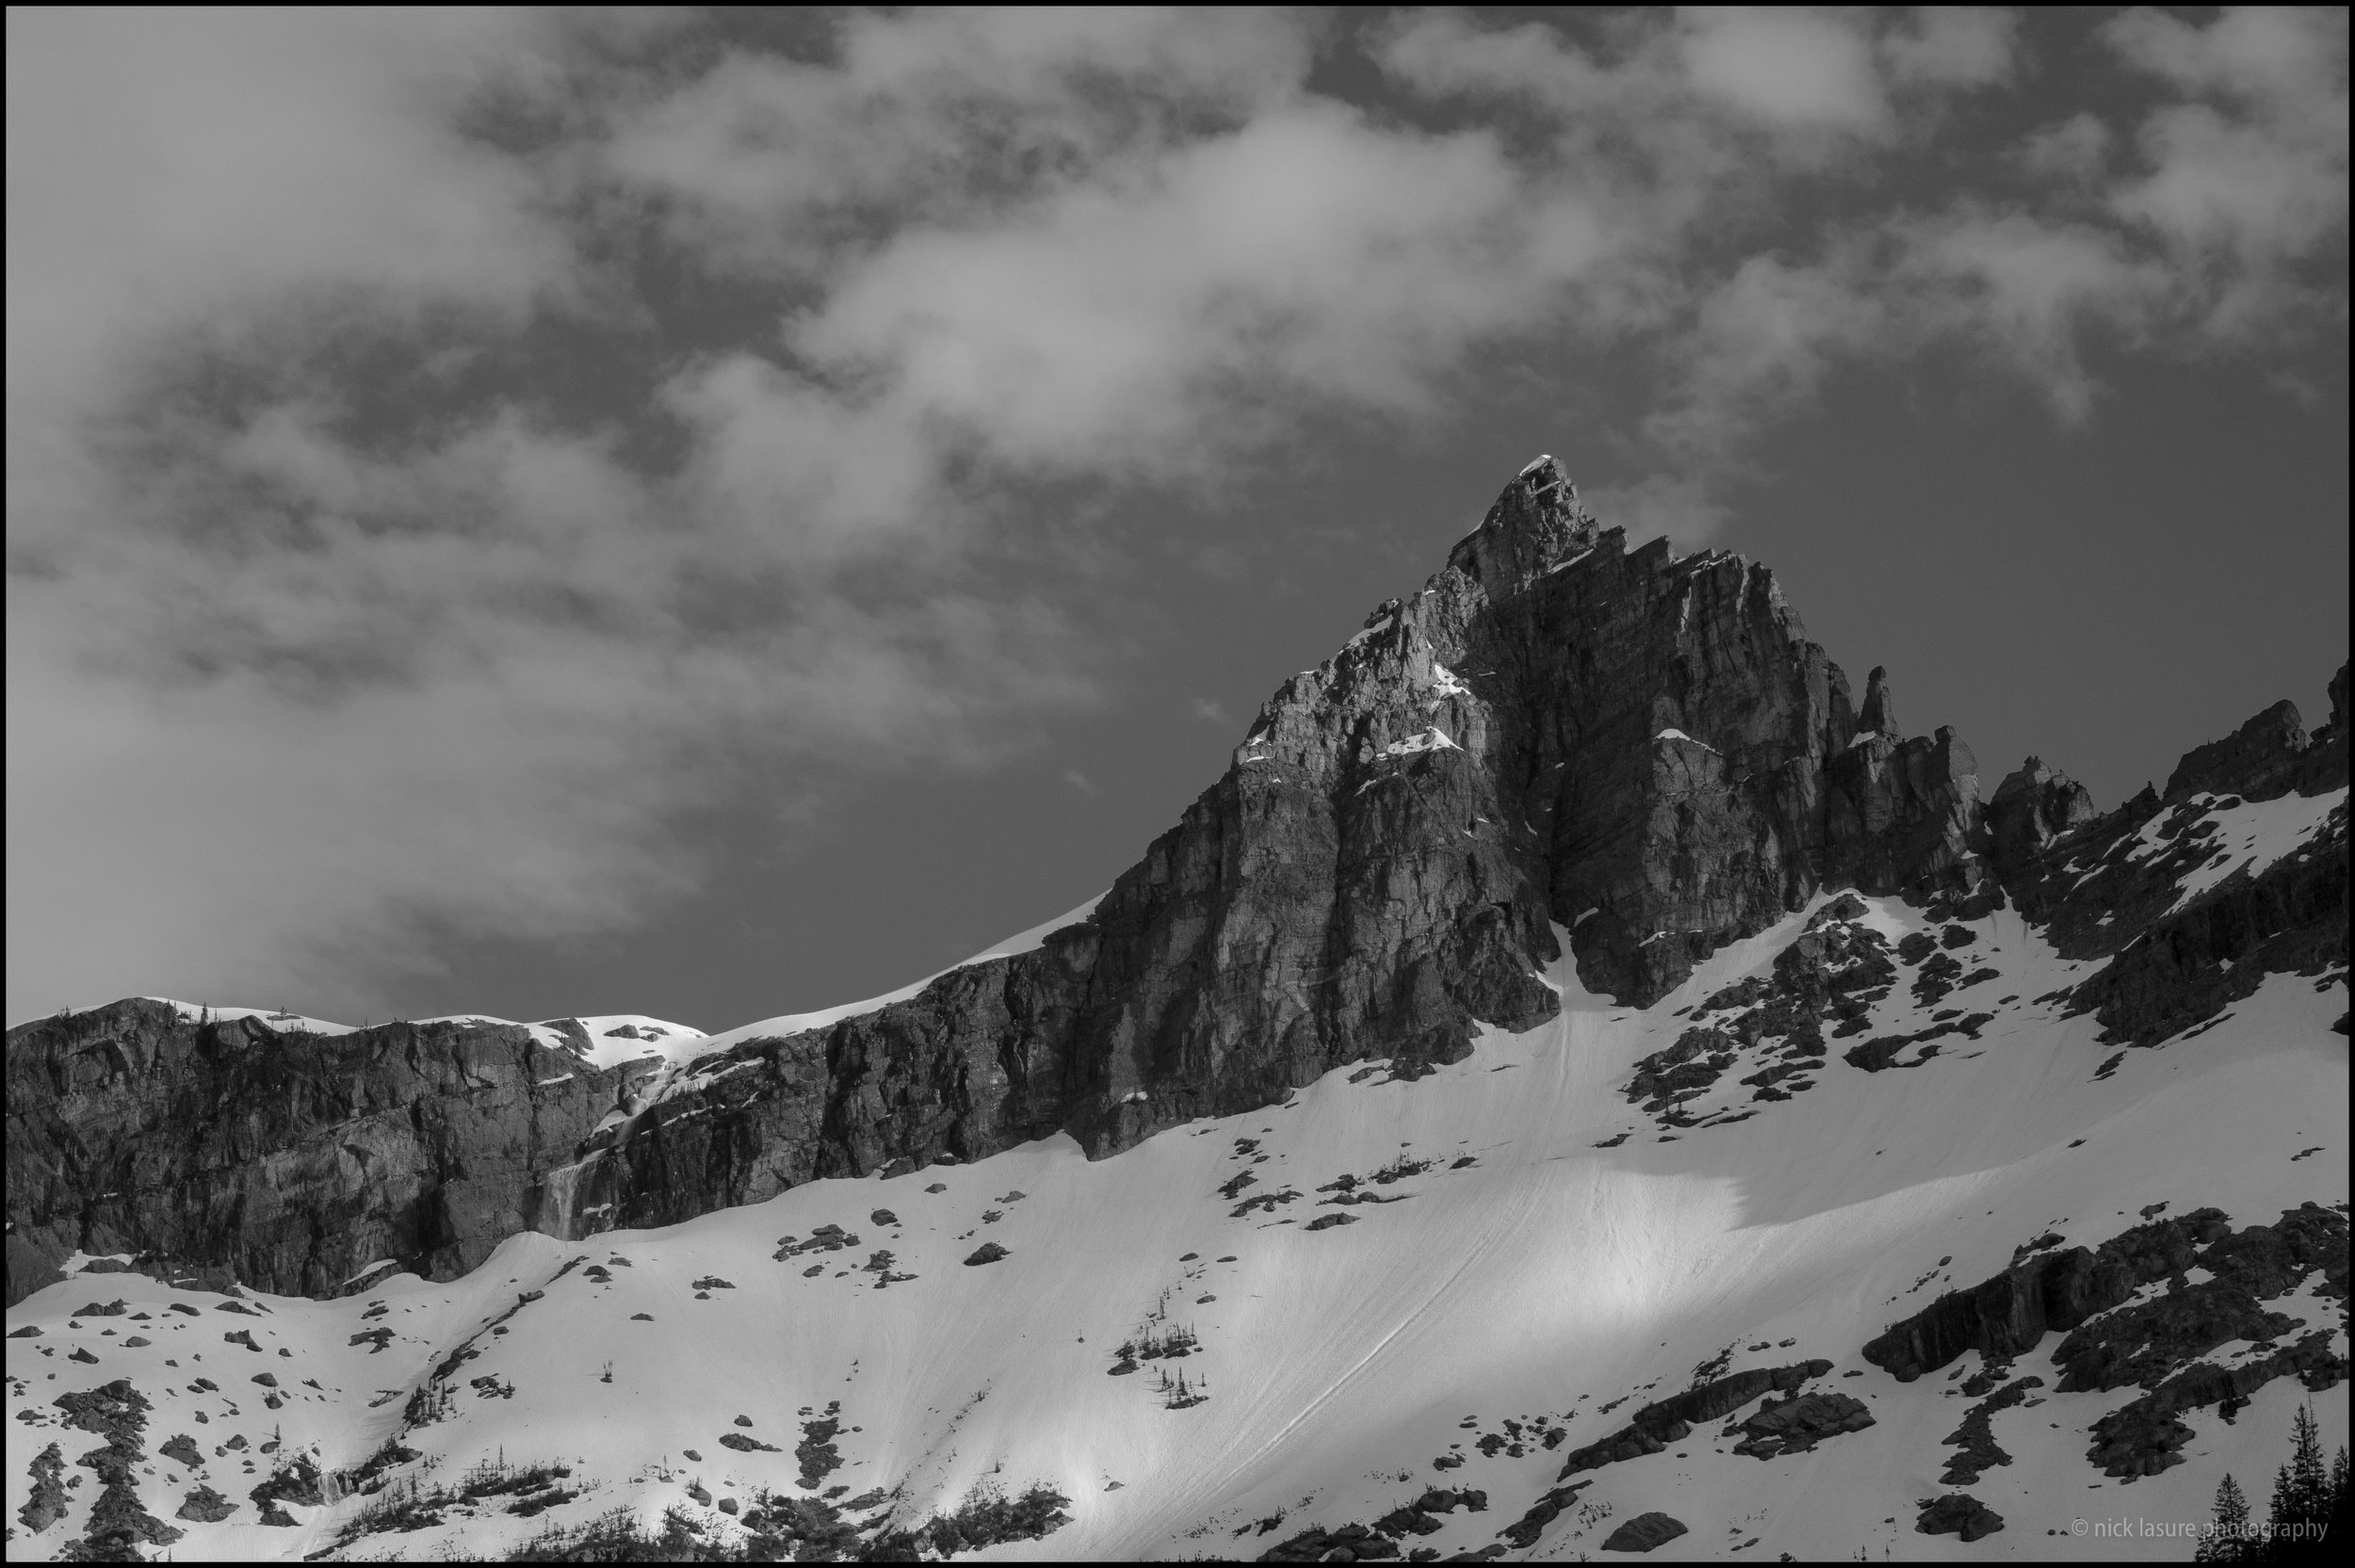
Before/After #2 - This image is from Glacier National Park in Montana. Taken with my old Nikon D300 the original file was a RAW file (NEF) with good exposure. Though I thought it might look better as a black & white image with a few adjustments. So I used the layering/stacking method with the following presets in this order: (1) Base - Monochrome Fantasy (2) Exposure - Less Highlights (5) Polish - Less Contrast (6) Vignette - Subtle Black.
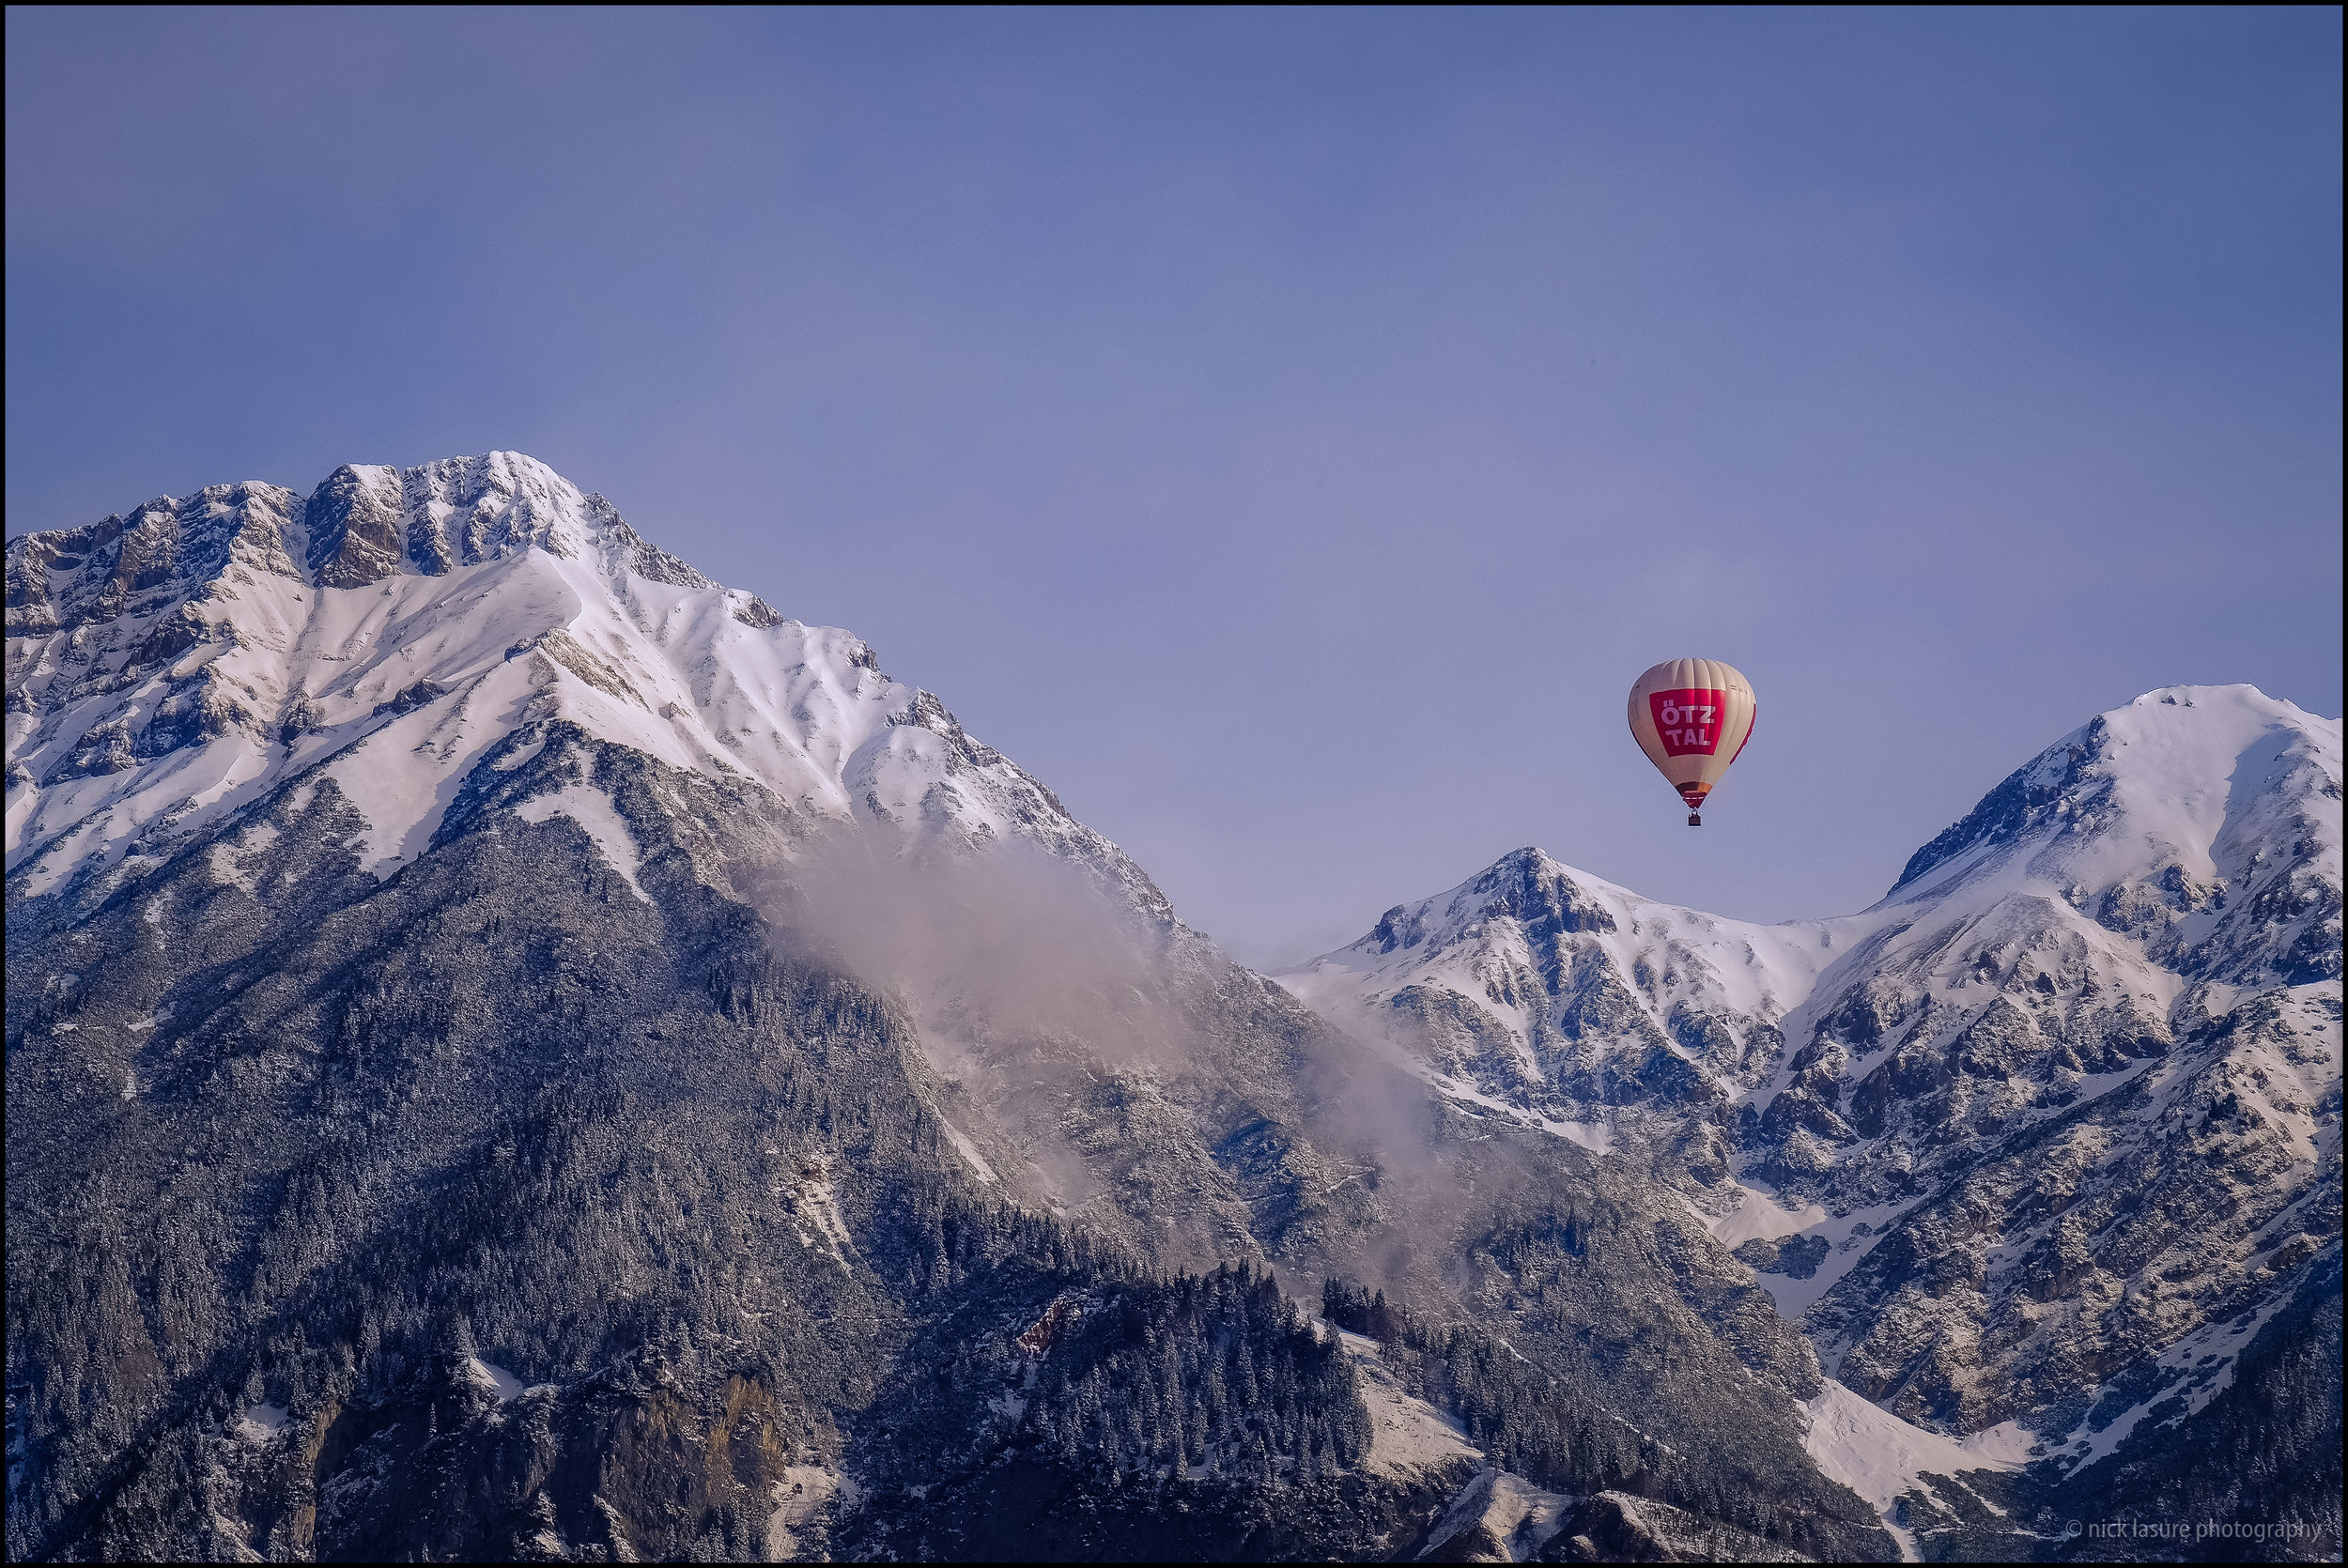
Before/After #3 - The final image was taken from our balcony in Innsbruck, Austria while on holiday. Once again, the first image was well exposed from my Fuji X-T1 and another SOOC JPEG. I utilized the entire suite of options from the 'Through the Woods' landscape preset offering to include local brush adjustment presets. (1) Base - Cinematic (2) Exposure - Less Highlights (3) Color Correct - Reduce Yellows (4) Tone/Tint - Warm (5) Polish - Sharpen (6) Vignette - Subtle Black + Bright Shadows Adjustment Brush on the ballon and Darken Shadows Brush on the mountains.
Conclusion - Presets Worth the Investment?
So in the end are presets like what Sleeklens offer worth your hard earned money? Absolutely, but with a few caveats you should consider.
Preset packages tend to come with lots of looks/options some of which are superfluous or overkill for some photographer's editing needs, this package included. With so much at your fingertips it is easy to over-edit your images or just get lost in the editing process. If you know your way around Lightroom and have your own style chances are flooding your presets menu with more options isn't for you.
That said, presets tend to help photographers develop their style, help work through editing mental blocks and can be useful in learning how to edit as you can see the changes that happen.
While presets can be a dime a dozen the Sleeklens offering is different enough in the building block/layering methodology to offer something unique. While I'll remove certain presets & brush/gradient options I'll definitely keep a lot of it around for future use. If you are in the market for presets I'd definitely give them a solid look.
https://sleeklens.com/product-category/lightroom-presets/
https://sleeklens.com/lightroom-tutorials/
*disclaimer - I did receive the presets free in exchange for an honest review.